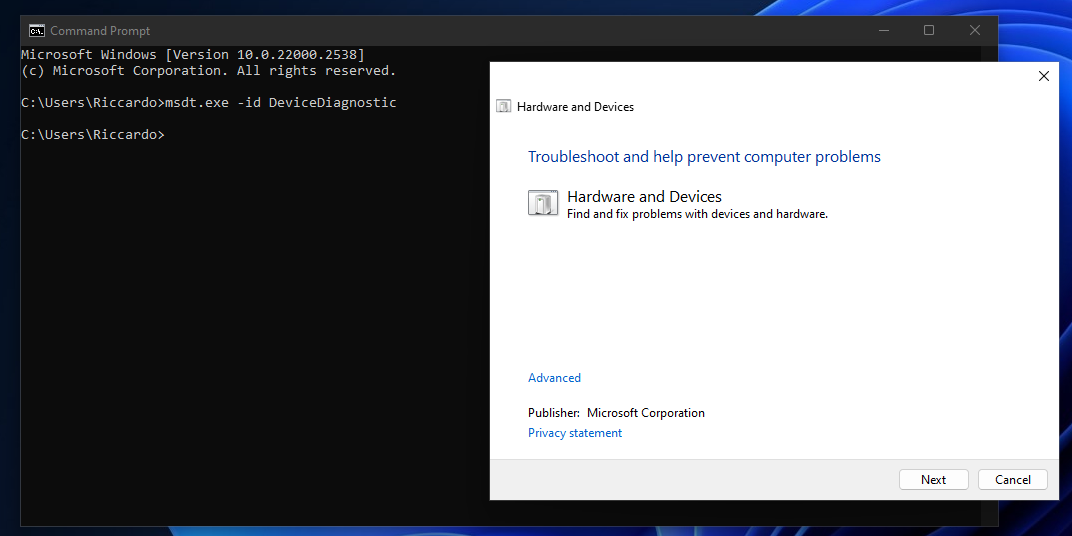
I have recently had to help a colleague with an issue on her computer: her USB ports were throwing an error about a power surge. The manufacturer’s official documentation recommended going through a list of steps, which included opening the hardware troubleshooter. A look at the Settings app revealed that it was removed from the menu in Windows 11 and is therefore inaccessible.
The manufacturer recommended to use the “Get Help” app to open it, but that didn’t work (and it sent me on a whole new side quest, as the app did not work at all).
How can you open the hardware troubleshooter on Windows 11, then? The answer is that you need to do so through the command line. Here is what you need to do, step by step:
- open the Start menu or the search menu
- type “cmd”
- select the command prompt app
- type “msdt.exe -id DeviceDiagnostic” and press enter
This will open the hardware diagnostic dialogue. While this did not help me in the end, it might still be worth trying for you!
Leave a Reply